


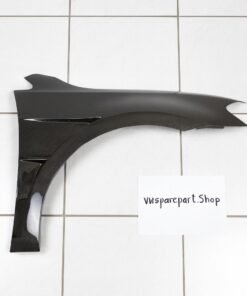
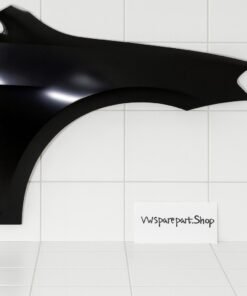
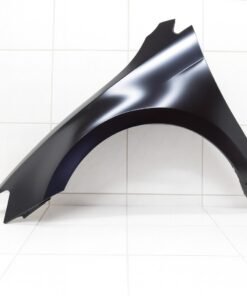
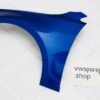
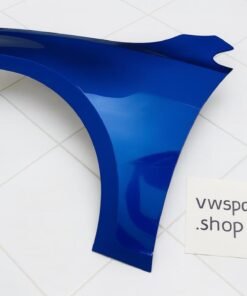
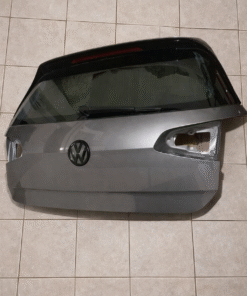
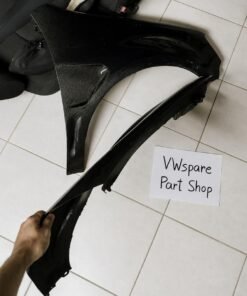
Volkswagen GTI Mk7.5 OEM Front Fenders 2018-2021 – Genuine Factory Panels | Driver & Passenger Side | Perfect Fitment
Why Genuine Volkswagen GTI Mk7.5 OEM Fenders Are the Only Panels Worth Bolting to Your Hot Hatch
Walk into any Volkswagen dealership parts department in 2025, ask for a front fender for a 2018–2021 GTI Mk7.5, and the counter person will hand you a box that weighs roughly 13 pounds, smells faintly of factory primer, and carries the unmistakable aura of Wolfsburg DNA. That box contains the genuine Volkswagen GTI Mk7.5 OEM front fender, the exact same panel that rolled off the Puebla or Wolfsburg assembly line on every single Mk7.5 GTI ever built. No aftermarket knock-off comes close. Not even remotely vw gti mk7.5 Original fenders.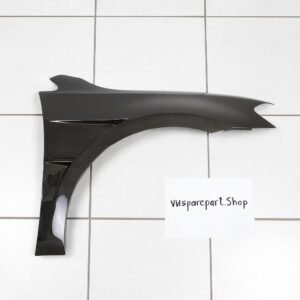
First and foremost, fitment is absolute perfection. Every curve, every mounting hole, every seam was stamped using the original factory dies that Volkswagen spent millions developing. Consequently, when a professional body shop bolts on a genuine Mk7.5 GTI fender, the panel aligns with the hood, front bumper, A-pillar, and door within half a millimeter—often better than the original panel did after eight years of heat cycles, stone chips, and minor parking-lot love taps. Installers regularly report that they spend more time removing the old fender than they do aligning the new one.
Moreover, the steel itself is identical to factory specification. Volkswagen uses high-strength, dual-phase steel with precise zinc galvanization and e-coat primer applied in the same robotic booths that coat brand-new cars. Because of this, corrosion resistance matches the rest of the unibody exactly. Owners in the Northeast and Midwest Salt Belt routinely replace rusted aftermarket fenders after just two winters, only to discover their new “budget” panel is already bubbling again.
Genuine OEM fenders, however, last another decade or more because the metal and coatings were engineered together from day one.
Additionally, every factory provision is present and correct. The driver-side fender includes the exact antenna base mounting location and threaded brass inserts that aftermarket panels often omit or get wrong. Both sides feature perfectly placed side-marker light cutouts (US/Canada spec) with reinforcement dimples that prevent cracking around the bulb socket—something cheap reproductions frequently ignore.
Inner fender liner attachment points, bumper bracket tabs, and hood hinge reinforcement plates are all stamped in the correct locations with factory tolerances. Therefore, no drilling, no fabrication, and no “close enough” compromises ever enter the conversation.
Furthermore, the primer itself is a masterpiece of German over-engineering. Volkswagen applies a gray electrophoretic e-coat primer followed by a sealer that body shops describe as “buttery” to work with. Because this primer was formulated specifically for VW’s waterborne paint system, adhesion is flawless and color match is dramatically easier than with generic aftermarket primers that often require extra etching primer or cause orange peel. Professional painters repeatedly say they can achieve factory-level results with half the blocking and polishing time when starting from a genuine VW panel.
The part numbers themselves tell the story of precision:
- Driver Side (Left) – 5G0 821 105 C
- Passenger Side (Right) – 5G0 821 106 C
These supersede earlier Mk7 part numbers because the facelift Mk7.5 received subtle but important changes to the front bumper mounting flange and headlight alignment tabs. Consequently, only these exact parts fit the 2018–2021 GTI without modification—whether you own an S, SE, Autobahn, Rabbit Edition, or TCR.
Moreover, structural integrity remains uncompromised. Although many owners think of fenders as purely cosmetic, Volkswagen engineers design them as part of the front crash structure. Genuine panels include the correct energy-absorbing crumple zones and reinforcement brackets that aftermarket manufacturers often thin out to save weight and cost.
Because of this, insurance companies and collision repair specialists strongly prefer (and sometimes require) OEM panels to restore pre-accident safety and maintain resale value.
Additionally, every genuine fender carries Volkswagen’s full 12-month/unlimited-mile parts warranty, something no aftermarket company dares to offer. Therefore, if a rare defect appears—say, a paint adhesion issue or a mis-stamped hole—Volkswagen replaces it free of charge through any authorized dealer nationwide.
The difference becomes obvious the moment you compare panels side-by-side. Aftermarket fenders frequently arrive with:
- Thinner metal that flexes when you push on it
- Incorrect curvature around the wheel arch (creating huge gaps or rubbing tires)
- Misaligned bumper mounting tabs that force technicians to slot holes
- Cheap black primer that requires complete stripping before painting
- Missing or incorrectly placed reinforcement dimples
Genuine Volkswagen fenders arrive looking and feeling like they were gently removed from a brand-new 2021 TCR sitting on the showroom floor. The weight, the ring when you tap them, the crispness of every stamped line—everything screams factory.
Furthermore, long-term ownership costs plummet with OEM panels. Because fitment is perfect, body shops charge significantly less labor—often 2–3 hours per side versus 5–8 hours fighting aftermarket gaps and waves. Paint matches on the first try instead of requiring multiple resprays. Corrosion stays away for another decade instead of returning in 24 months. Resale value remains intact because discerning buyers (and Carfax reports) can instantly spot aftermarket repairs.
Owners who have gone both routes almost universally regret trying to save money with replicas. One 2019 GTI owner in New York spent $380 on a pair of aftermarket fenders plus 14 hours of shop labor fighting gaps and waves, only to replace them 18 months later with genuine VW panels because rust bubbles appeared along the poorly sealed seams.
Total cost: over $1,800 and two rounds of downtime. Another owner paid $1,100 upfront for genuine fenders and professional installation, finished the job in one day, and still has perfect panels five years later.
Because the Mk7.5 GTI production ended in 2021, genuine fender supply is finite. Volkswagen continues manufacturing replacement panels in the same factories, but demand from collision repairs, rust-belt replacements, and widebody reversions grows every year. Consequently, smart owners stock up now while new-old-stock and fresh production units remain readily available through authorized channels.
In short, if you own a 2018–2021 Volkswagen GTI Mk7.5 and care about perfect fitment, factory-correct appearance, long-term corrosion resistance, structural safety, and maintaining resale value, there is only one choice: genuine Volkswagen OEM front fenders. Everything else is a compromise dressed up as savings.
The Hidden Differences – What Happens When You Bolt On Aftermarket vs. Genuine Volkswagen GTI Mk7.5 Fenders – vw bus
Everyone loves to save money. Everyone also loves to tell themselves “it’s just a fender” and “no one will ever notice.” Until they do.
Here’s the cold, hard truth from body shops, detailers, GTI owners, and anyone who has lived through both experiences: the gap between genuine Volkswagen Mk7.5 OEM fenders and even the “best” aftermarket reproductions is massive. What looks like a $300–$400 savings on paper often turns into a $1000–$2000 nightmare once labor, paint, rust, and regret enter the equation.
1. Fitment – The First and Biggest Lie Aftermarket manufacturers reverse-engineer panels from a single scanned fender—usually a used, slightly bent one from a salvage yard. Consequently, every curve is an approximation. The wheel-arch radius might be 2–4 mm off. The bumper mounting flange can sit 3 mm proud or recessed.
The hood line may dip or rise at the front corner. Installers spend hours with hammers, dollies, heat guns, and shims trying to make it “close enough.” Genuine Volkswagen fenders, however, drop into place like they were never removed.
The hood gaps remain perfectly even at 4.5 mm all the way across. The bumper cover clicks in without forcing tabs or leaving huge gaps at the headlight. The door line stays flush. Most body shops finish alignment in under thirty minutes per side.
2. Metal Thickness & Rigidity – You Can Feel It Pick up an aftermarket fender and it flexes like cheap patio furniture. Push on the wheel arch and it oil-cans. Tap it with your knuckle and it sounds tinny. Pick up a genuine VW fender and it rings solid.
The metal is the exact factory gauge (0.8–0.9 mm high-strength dual-phase steel in critical zones). It resists flex exactly like the rest of the unibody. Because of this, panel gaps stay consistent through heat cycles and minor impacts instead of waving or popping over speed bumps.
3. Primer & Paint Adhesion – The Expensive Surprise Aftermarket fenders arrive in cheap black shipping primer or bare metal. Body shops must completely strip, etch, and re-prime before painting—adding 3–6 hours of labor. Even then, many generic primers react poorly with VW’s waterborne paint, causing orange peel, fisheyes, or peeling within a year.
Genuine fenders come in Volkswagen’s factory e-coat gray primer plus sealer—the same system used on every new GTI. Painters scuff lightly, shoot base, clear, and done. Color match is perfect on the first try because the primer was formulated for VW paint codes. No extra stripping. No adhesion promoters. No callbacks.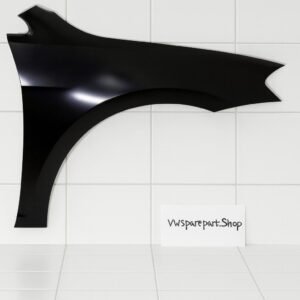
4. Corrosion Resistance – The Silent Killer Aftermarket panels often skip proper galvanization or use thinner zinc coating to cut costs. Seams and hems receive little to no e-coat penetration. Consequently, rust bubbles appear along the lower edge and wheel arch within 18–36 months in salt states.
Genuine VW fenders receive full robotic e-coat immersion plus cavity wax in hidden areas—just like the original car. Owners in Ohio, Pennsylvania, and New York report zero rust on OEM replacement fenders after five-plus winters, while their old aftermarket panels looked like Swiss cheese in half that time.
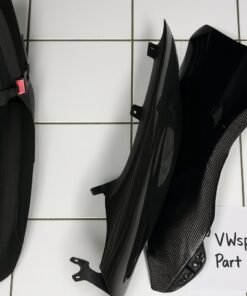
5. Factory Provisions – The Details That Matter Aftermarket fenders routinely botch or omit:
- Antenna base brass inserts (driver side) – often missing or wrong thread
- Side-marker light reinforcement dimples – cheap panels crack around the bulb within months
- Inner liner push-pin locations – off by 10–15 mm, forcing broken clips or zip ties
- Bumper bracket reinforcement plates – either too thin or completely absent
Genuine fenders include every single factory provision in the exact location with the correct reinforcement. Consequently, you reuse your original antenna base, side markers, and liner clips without modification or frustration.
6. Structural Safety – It’s Not Just Cosmetic Volkswagen designs front fenders as part of the crash-energy management system. Specific crumple zones and reinforcement brackets help absorb and redirect impact away from the cabin.
Aftermarket manufacturers thin these areas to save weight and cost. Because of this, insurance companies and collision-certification programs often reject non-OEM panels for structural repairs. Genuine fenders restore factory safety exactly as Volkswagen engineered it.
7. Resale Value & Buyer Scrutiny – The Long Game Enthusiast buyers and dealership appraisers spot aftermarket fenders in seconds: uneven gaps, wrong primer flashing at the jambs, missing part-number stamps, or cheap metal flex.
A $60,000 low-mileage 2021 TCR can lose $3,000–$5,000 instantly if the Carfax shows collision repair with aftermarket parts. Genuine OEM fenders leave no trace. The repair disappears. Resale value stays intact. The next owner never knows (or cares) the car was ever hit.
Real-World Horror Stories vs. Success Stories
- Aftermarket disaster (Reddit user u/GTIrustbelt): Bought $350 pair of “CAPA-certified” fenders. Body shop charged 18 hours fighting gaps. Paint still didn’t match perfectly. Rust bubbles appeared after second winter. Total spent: $2,400+.
Sold the car at a loss because buyers walked away.
- OEM success (VWVortex user “Rabbit2021”): Paid $1,100 for genuine driver-side fender after deer strike. Body shop finished in one day. Paint match perfect. Zero rust five years later. Sold the car for top dollar—no questions asked.
The Math Most People Ignore Aftermarket route (typical):
- Fenders: $380–$450 pair
- Extra labor for fitment & primer stripping: 8–14 hours @ $120/hr = $960–$1,680
- Possible repaint due to adhesion issues: $400–$800
- Early rust repair in 3–5 years: another $1,200+ Total: $2,700–$4,000+ over five years
Genuine OEM route (typical):
- Fenders: $980–$1,200 pair shipped
- Standard labor (4–6 hours total): $480–$720
- Paint matches first try, zero rust Total: $1,500–$2,000 and done forever
The “cheap” option often costs double long-term.
Widebody Reversion Nightmare Countless Mk7.5 owners who installed Liberty Walk, Clinched, or Pandem wide fenders later decide to return to stock. They quickly discover their original fenders were cut up or sold. Aftermarket “OEM-style” replacements arrive and look completely wrong next to factory doors and bumpers. Only genuine VW fenders restore the clean, factory lines that made the Mk7.5 GTI iconic in the first place.
Bottom line You can gamble on aftermarket and hope you get one of the rare “good” batches. Or you can install genuine Volkswagen Mk7.5 OEM fenders once, perfectly, and never think about it again.
Step-by-Step Installation Guide – How to Replace Your Mk7.5 GTI Fenders Like a Factory Technician – vw id buzz
Replacing a front fender on a 2018–2021 Volkswagen GTI Mk7.5 is one of the most satisfying jobs a DIY enthusiast or professional body tech can perform, especially when the panel is a genuine OEM part. Because fitment is perfect, the entire process feels like a well-choreographed dance instead of the usual wrestling match required with aftermarket panels. Follow this exact sequence and you’ll achieve factory-perfect results every single time.
Tools & Supplies You’ll Need
- 10 mm, 13 mm, and 16 mm sockets + ratchet
- T30, T25, and T20 Torx drivers
- Plastic trim tools (essential to avoid scratching paint)
- ¼-inch torque wrench (critical for hood bolts)
- Floor jack + jack stands or lift
- Masking tape painter’s tape
- Nitrile gloves
- Shop towels and brake cleaner
- Genuine Volkswagen fender (left 5G0 821 105 C or right 5G0 821 106 C)
- Optional: new fender liner clips and bumper cover clips
Step 1 – Preparation & Safety (15 minutes) Park the car on a level surface and engage the parking brake. Disconnect the negative battery terminal if you plan to remove the headlight (recommended for extra clearance). Cover the front bumper and hood edges with painter’s tape to prevent accidental scratches. Because the Mk7.5 uses plastic bumper covers, scratches show instantly.
Step 2 – Remove the Front Wheel & Inner Liner (20–30 minutes per side) Jack the car and support it securely on stands. Remove the front wheel. Next, remove the inner fender liner:
- T25 Torx screws along the bottom edge
- Plastic push pins along the top (pull center pin first)
- 10 mm bolt at the rear of the liner Gently pull the liner outward. This exposes the lower fender bolts and gives full access to the bumper-to-fender seam.
Step 3 – Detach the Bumper Cover from the Fender (15 minutes per side) Pop the hood. Remove the six T30 Torx screws across the top radiator support. From underneath, remove three 10 mm bolts holding the lower bumper to the fender flange. Using plastic trim tools, gently release the five to six plastic clips along the fender-to-bumper seam.
Pull the bumper cover outward approximately 4–6 inches (no need to fully remove unless replacing both fenders).
Step 4 – Disconnect Side Marker & Antenna (10 minutes) Reach inside the fender cavity and unplug the side-marker light harness (squeeze tab and pull). On the driver side, remove the antenna base vw bus:
- 13 mm nut on top of the fender
- Gently feed the cable downward Label everything with masking tape so reassembly is fool-proof.
Step 5 – Remove the Old Fender (15 minutes) Visible Bolts)** Locate and remove:
- Two 13 mm bolts at the top (under hood edge)
- One 10 mm bolt inside the door jamb (open door fully)
- One 10 mm bolt behind the side marker hole
- Three 10 mm bolts along the bottom (now visible after liner removal)
- One 10 mm bolt at the rear vertical seam (near A-pillar)
Once all fasteners are out, gently rock the fender forward and upward. It releases cleanly because Volkswagen designed it that way.
Step 6 – Clean & Prep the Mounting Surfaces (10 minutes) Use brake cleaner and shop towels to remove old seam sealer, undercoating, and surface rust from the inner fender rail and A-pillar flange. Apply a light coat of cavity wax or rust inhibitor to bare metal areas. This single step prevents hidden corrosion for the next decade.
Step 7 – Test-Fit the Genuine OEM Fender (5 minutes) Place the new genuine Volkswagen fender loosely in position. Because every hole aligns perfectly, you’ll feel it “drop” into place like a puzzle piece. Hand-thread two top bolts and one lower bolt to confirm fitment.
Check gaps at hood, door, and bumper—they should be even at 4–5 mm all around. If everything looks perfect (it will), proceed.
Step 8 – Transfer Components to New Fender
- Install your original antenna base (driver side) with new 13 mm nut – torque to 6 Nm
- Transfer side-marker light assembly (twist-lock)
- Transfer any sound deadening pads or foam blocks from the old fender
Step 9 – Final Installation & Torque Specs Install bolts in this exact order for perfect alignment:
- Top two 13 mm bolts – 21 Nm
- Door-jamb 10 mm bolt – 9 Nm
- Rear vertical seam 10 mm bolt – 9 Nm
- Bottom three 10 mm bolts – 9 Nm
- Side-marker area 10 mm bolt – 6 Nm
Because genuine panels fit correctly, you never fight cross-threaded or misaligned holes.
Step 10 – Reinstall Bumper Cover Push the bumper cover back into position. Reinstall lower 10 mm bolts and plastic clips along the seam. Reinstall top T30 Torx screws across radiator support. Torque everything to factory specs.
Step 11 – Reinstall Inner Liner & Wheel Clip the liner back into place. Install new push pins if old ones broke (highly recommended). Reinstall wheel and torque lug bolts in star pattern:
- Steel wheels: 120 Nm
- Alloy wheels: 120 Nm
Lower the car.
Step 12 – Final Alignment & Quality Check (10 minutes) Close the hood gently and check gaps all around. Adjust hood stops if needed (rare with OEM panels). Open and close the door—listen for even “thunk.” Walk around the car at eye level—lines should flow perfectly from roof to bumper.
Professional Tips That Save Hours – vw id buzz
- Tape the headlight edges before starting—prevents chips 100 %.
- Use a ¼-inch drive torque wrench for every fastener—over-torquing strips aluminum threads.
- Install the top two bolts first, then the door-jamb bolt—this locks alignment perfectly.
- Warm the car in sunlight before final gap check—metal expands evenly.
- Apply a thin bead of black 3M seam sealer along the fender-to-inner-structure joint for factory appearance and extra rust protection vw id buzz.
Common DIY Mistakes to Avoid
- Forgetting the hidden 10 mm bolt inside the door jamb (most missed bolt)
- Over-tightening plastic bumper clips—cracks the tabs instantly
- Skipping painter’s tape—leads to $300 paint touch-ups
- Installing aftermarket fender without test-fitting—wastes hours later
Time Estimate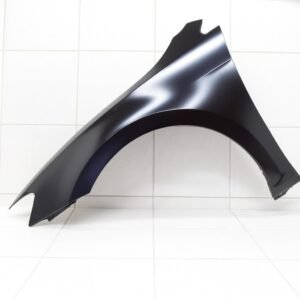
- First-time DIY: 2.5–4 hours per side
- Experienced DIY: 90–120 minutes per side
- Professional body shop: 1–1.5 book hours per side (because OEM fitment is that good)
Why the Job Feels So Different with Genuine Panels Every technician who has installed both types says the same thing: aftermarket fenders fight you the entire time. You chase gaps, slot holes, add washers, and still end up with waves or uneven lines. Genuine Volkswagen fenders feel like the car is thanking you. Bolts thread smoothly.
Panels drop into place. Gaps are perfect before you even tighten anything. The job that usually takes all weekend becomes a relaxed Saturday morning.
Post-Installation Care Wait 24–48 hours before washing if the car is freshly painted. Apply a quality synthetic sealant or ceramic coating to the new fender for extra protection against stone chips. Inspect seam sealer annually in rust-belt states and touch up as needed.
Final Thoughts When you finish bolting on a genuine Mk7.5 GTI OEM fender, step back and look at your work. The lines flow perfectly. The gaps are even. The car looks exactly like it did rolling off the transporter in 2018–2021. No one will ever know it was repaired—because it wasn’t repaired. It was restored to factory specification.
Be the first to review “Volkswagen gti mk7.5 Original fenders”
Related products

FENDERS
FENDERS
FENDERS
Reviews
There are no reviews yet.